

How Do You Read Wheel Offset on a Rim?
Last Updated: October 24, 2026
Quick Summary
Wheel offset is the distance in millimeters between a wheel's hub mounting surface and its centerline, and you read it from the stamping on the wheel, shown as ET followed by the number, such as ET+40 for positive 40 mm. Positive offset tucks the wheel inboard, negative pushes it outboard, and zero sits on the centerline.
- Offset is always measured in millimeters, while diameter and width are stamped in inches.
- Stay within about 5 mm of the original factory offset to preserve handling and clearance.
- Measure overall width, find the centerline, measure backspacing, then calculate offset.
- A 20x10 -18 wheel change moves the outer edge out roughly 50 mm compared to a 20x9 +20.
- Check brake, suspension and fender clearance at ride height, full compression and full lock.
Table of Contents
- What Wheel Offset Actually Tells You
- Positive vs Negative Wheel Offset: What Each One Does to the Wheel Face
- How to Read the Markings Stamped on a Wheel
- How to Measure Wheel Offset With the Wheel Off the Car
- Wheel Offset and Backspacing: Two Numbers, One Geometry
- Using a Wheel Offset Calculator Without Guessing
- Fitment Checks for Brakes, Suspension, and Fender Clearance
- Safe Limits and What Changing Factory Offset Costs You
- Start With Your Vehicle Before You Order
- Frequently Asked Questions
What Wheel Offset Actually Tells You
Wheel offset is the distance, measured in millimeters, between a wheel's hub mounting surface and its true centerline. That single number decides how far the wheel sits inboard or outboard relative to your fender, and it is the specification most buyers misread. This guide from Project Wheel Works walks through exactly how to read wheel offset, measure it, and check it against your vehicle before you order. Get it wrong and you get rubbing, clearance problems, or a stance that never looks right.
Offset is not a styling detail you sort out after the fact. It is a geometry value that changes where the tire sits, how the steering loads up, and whether the wheel clears your brakes. The number stamped on the rim is the starting point for every fitment decision.
Mounting Surface, Centerline, and the Distance Between Them
Picture the wheel cut in half down its width. The wheel centerline is the midpoint of that width. The hub mounting surface is the flat face that presses against your vehicle's hub when you bolt the wheel on. Offset is the gap between those two planes.
Three reference points matter:
- Wheel width: the distance between the inner and outer bead seats, where the tire sits
- Centerline: halfway across that width
- Mounting surface: where the wheel contacts the hub
If the mounting surface sits outboard of the centerline, you have positive offset. If it sits inboard, you have negative offset. If the two planes line up exactly, offset is zero. The measurement is always in millimeters, and the direction matters as much as the number.
Why the Factory Number Matters More Than the Look
The offset your vehicle left the factory with reflects a stack of engineering decisions: wheel bearing load, scrub radius, brake clearance, and how the tire tracks through a corner. Industry guidance from Modern Tire Dealer's offset guidance suggests staying within about 5 mm of the original factory offset in either direction to preserve handling and clearance behavior. Industry benchmarks suggest this range helps maintain optimal steering feel and suspension load distribution.
Most guides skip that part and jump straight to "how aggressive can I go." That is backwards. Start with the factory number, understand what it protects, then decide how far you are willing to move. A wheel that looks perfect in a photo but sits 25 mm off the factory spec can change steering feel and put load where the hub was not designed to carry it.
Positive vs Negative Wheel Offset: What Each One Does to the Wheel Face
Positive offset pushes the mounting surface outboard, tucking the wheel and tire deeper into the fenderwell. Negative offset pulls the mounting surface inboard, pushing the wheel face outward toward the fender lip. Zero offset puts the mounting surface on the centerline, so the wheel sits neutral.
Here is how the three cases behave in practice:
| Offset Type | Wheel Face Position | Typical Effect | Common Use |
|---|---|---|---|
| Positive | Tucked inboard | Narrower track, more inner clearance risk | Factory setups, front-wheel drive |
| Zero | Neutral on centerline | Balanced stance, moderate poke | Aftermarket street setups |
| Negative | Pushed outboard | Wide stance, more fender clearance risk | Trucks, lifted builds, deep lips |
Positive offset is the default on most factory wheels because it keeps the tire inside the fender and reduces load on the wheel bearings. Negative offset gives you the wide, planted look many drivers want, but it moves the tire closer to the fender lip and the outer edge of the fenderwell.
Zero Offset and the Case Where the Numbers Match
Zero offset is the neutral case: the hub mounting surface lines up with the wheel centerline. It is less common on factory vehicles but shows up often in aftermarket truck and off-road fitments where a wider stance is the goal.
The catch is that zero offset is not automatically "safe" or "aggressive." It depends entirely on the wheel width and the vehicle. A zero-offset 9-inch wheel on a truck with wide fenders may sit flush; the same offset on a narrow-bodied car may poke out past the fender. Offset only means something in relation to width.
How to Read the Markings Stamped on a Wheel
Wheel markings are stamped or cast into the hub pad, the spoke face, or the inner barrel, and they follow a consistent order: diameter, width, bolt pattern, offset, and center bore. Reading them in sequence tells you everything you need to match a wheel to your vehicle. Most guides stop at the definition; the practical skill is knowing where to look and how to parse the notation when it is abbreviated, mixed, or worn.
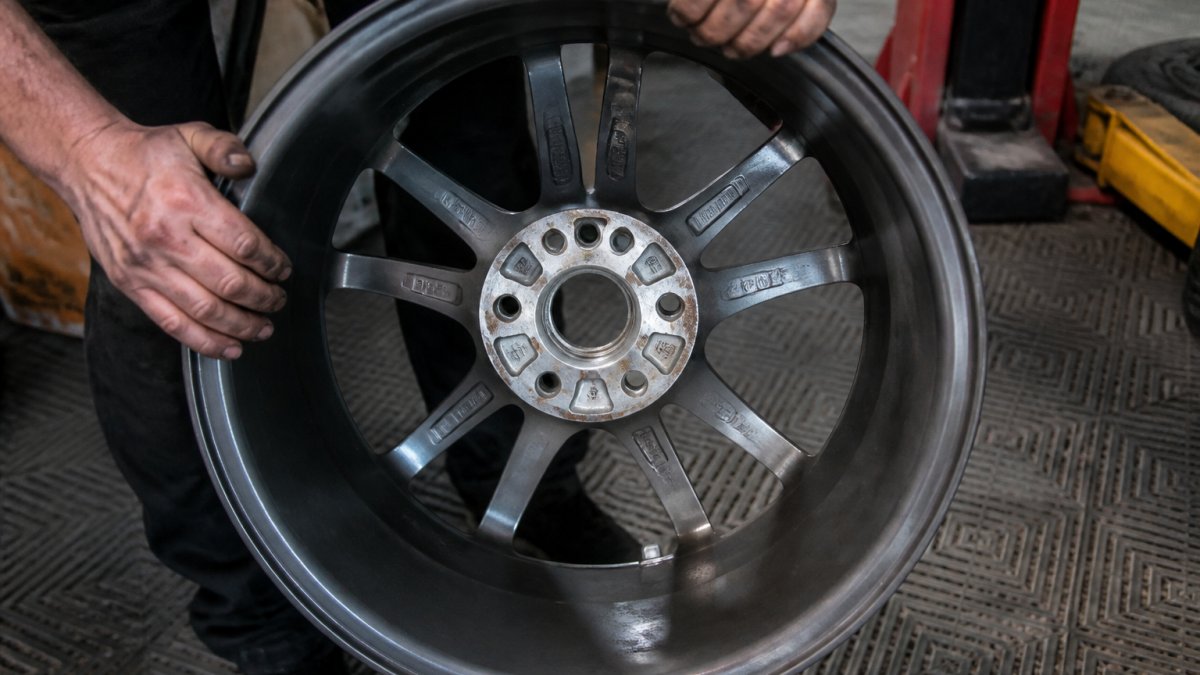
Where the Markings Actually Live
Manufacturers do not standardize a single location, so check these spots in order:
- Hub pad (mounting face): the flat area around the center bore. Most common on aftermarket alloy wheels.
- Spoke face near the lug holes: often where diameter, width, and ET are cast in raised lettering.
- Inner barrel (behind the spokes): common on OEM wheels and some aftermarket designs; you may need to look through the spokes or read from the inside.
- Outer lip or flange: less common, but some wheels stamp width and diameter here.
- Center cap or sticker: the least reliable source; treat stickers as a hint, not proof.
If you cannot find a stamp on the face, clean the inner barrel with a rag and use a flashlight at a low angle, cast lettering is easier to read with raking light.
Decoding a Full Stamping, Step by Step
Here is how to decode a typical stamping, using the VYBZ 18x8 5X112 ET+40 wheel as an example:

- 18x8: 18-inch diameter, 8-inch width. Diameter is always in inches; width is also in inches on most passenger and light-truck wheels.
- 5X112: five lug holes on a 112 mm bolt circle. The first number is the lug count; the second is the bolt circle diameter in millimeters.
- ET+40: offset of positive 40 mm. The letters ET come from the German term for offset and are the standard notation on most aftermarket wheels.
- 72.6: center bore diameter in millimeters. This is the hole that must clear your vehicle's hub; if it is larger, you need hub-centric rings.
Read the string left to right and you have the full fitment picture without measuring anything.
Notation Traps and How to Handle Them
A few patterns cause most misreads:
- Sign conventions: ET+40 is positive 40 mm; ET-15 is negative 15 mm. A bare number with no sign is usually positive, but confirm against the wheel's product listing or measure it.
- Millimeters versus inches: offset and bolt pattern are in millimeters; diameter and width are in inches. Do not convert offset to inches unless you are comparing to backspacing.
- Stamped versus cast: raised cast lettering can be faint; stamped numbers can be shallow. If a digit is ambiguous (a 6 versus an 8), measure to confirm rather than guess.
- Missing offset stamp: some wheels omit ET and rely on the product listing. If the stamp is absent or unreadable, measure offset directly (see the measurement section below).
- Dual bolt patterns: a stamp like 5X112/5X114.3 means the wheel is drilled for two bolt circles; confirm which one matches your vehicle.
A Quick Reference for Common Markings
| Marking | Meaning | Units |
|---|---|---|
| 18x8 | Diameter x width | inches |
| 5X112 | Lug count x bolt circle | count, mm |
| ET+40 | Offset, positive 40 | mm |
| ET-15 | Offset, negative 15 | mm |
| 72.6 | Center bore | mm |
| 5X112/5X114.3 | Dual bolt pattern | count, mm |
Once you can read a stamping in sequence, you can screen any wheel listing against your vehicle in under a minute, before you ever pick up a tape measure.
How to Measure Wheel Offset With the Wheel Off the Car
To measure wheel offset, you need the wheel lying flat, a straight edge long enough to span the rim, and a tape measure or caliper.
Total time: about 10 minutes per wheel Difficulty: beginner
What you'll need:
- The wheel, off the vehicle and lying face-up
- A straight edge or long level
- A tape measure in millimeters
- A flat surface
Step 1: Measure overall width. Lay the straight edge across the outer face of the rim and measure down to the floor.
Step 2: Find the centerline. Divide the overall width by two. Mark that distance on the barrel.
Step 3: Measure backspacing. Lay the straight edge across the inner face of the rim and measure from the mounting surface down to the straight edge. That is your backspacing.
Step 4: Calculate offset. Subtract half the overall width from the backspacing, then convert to millimeters. A positive result means positive offset; a negative result means negative offset.
Expected result: a number within a millimeter or two of the stamped value. If it is far off, recheck your straight edge placement before you trust the measurement.
Reading Backspacing Off a Straight Edge
Backspacing is the measurement from the inner edge of the wheel to the mounting surface, expressed in inches or millimeters. It is easier to measure than offset because you only need one straight edge and one reading, but it describes a different reference point. Backspacing is measured from the inner lip; offset is measured from the centerline.
VYBZ 18x8 5X112 ET+40 72.6 bore Black Wheel →
That difference matters when you compare wheels. Two wheels can share the same backspacing and still have different offsets if their widths differ. Always convert to the same reference before you compare.
Wheel Offset and Backspacing: Two Numbers, One Geometry
Offset and backspacing describe the same physical relationship from two different starting points, and confusing them is one of the most common fitment mistakes. Offset is measured from the centerline; backspacing is measured from the inner lip. Neither one alone tells the full story.
The conversion is straightforward once you know the width:
Backspacing = (wheel width ÷ 2) + (offset ÷ 25.4) + flange allowance
For a quick check, remember that a wider wheel with the same offset will have more backspacing, because half the added width goes inboard. That is why a 20x10 wheel and a 20x9 wheel with identical offset numbers do not sit the same on the vehicle.
As Modern Tire Dealer's fitment analysis notes, offset alone is not enough. Backspacing and scrub radius also determine whether the wheel clears the suspension and brakes. Treat offset as one input, not the whole answer.
Using a Wheel Offset Calculator Without Guessing
A wheel offset calculator compares your current setup to a proposed one and shows how far the wheel moves inboard and outboard. Online tools are now a standard part of fitment work, and this measurement walkthrough shows how to verify the numbers yourself rather than trusting the tool blindly.
The calculator needs four inputs:
- Current wheel width and offset
- Proposed wheel width and offset
- Tire size, if you want sidewall and clearance estimates
- Vehicle specs, where the tool supports them
The output tells you the change in inner and outer clearance in millimeters. That is the number that decides whether you rub.
Worked Examples: Same Width, Different Offset
Take a 20x9 wheel at +20 offset. Compare it to the same 20x9 width at +35. The +35 wheel sits 15 mm further inboard, which means 15 mm less outer clearance and 15 mm more inner clearance. On a truck with tight fender clearance, that 15 mm can be the difference between flush and rubbing.
Now compare a 20x9 at +20 to a 20x10 at -18. The width grows by 25 mm and the offset moves 38 mm negative. The outer edge moves out by roughly 50 mm, which is a substantial change in stance and clearance. That is the kind of move that demands the fitment checks below before you order.
| Wheel | Size | Offset |
|---|---|---|
| D681 Rebel | 20x9 | +20 |
| Same width, higher offset | 20x9 | +35 |
| FC866 Piston | 20x10 | -18 |
Fitment Checks for Brakes, Suspension, and Fender Clearance
Fitment checks confirm three things before you buy: the wheel clears the brake calipers, it clears the suspension components, and the tire stays inside the fender through full suspension travel. Skip any one of them and you risk rubbing, contact, or a wheel that will not bolt on. The difference between a generic checklist and a real fitment check is measurement, here is the repeatable workflow.
The Clearance Workflow, in Order
Work from the inside out, because inner clearance problems are harder to fix after purchase:
- Brake caliper clearance: with the wheel test-fitted or the spoke profile compared to your caliper, confirm at least a few millimeters of gap between the caliper face and the spokes. Deep-concave or flat-face spoke designs change this even when offset is identical.
- Inner barrel to suspension: check the distance from the inner lip to the strut, control arm, and tie rod at ride height. A wider wheel with the same offset adds half the extra width inboard, so a 25 mm wider wheel eats roughly 12.5 mm of inner clearance before offset changes anything.
- Fender clearance at full compression: compress the suspension (or load the vehicle) and check the tire-to-fender gap at the top of the arch.
- Fender clearance at full lock: turn the steering lock to lock and check the tire shoulder to the fender liner and bumper bracket.
- Brake line and wiring clearance: confirm no lines or harnesses sit in the new wheel's path at full lock and compression.
Putting Numbers on the Change
A wheel like the D-STRUCT 20x10 6X139.7 ET-15 78 bore Black Wheel is exactly the kind of fitment that demands all three checks. The wider track and pushed-out face look great, but they eat outer clearance fast. Compare it to a 20x9 at +20: the width grows by 25 mm and the offset moves 38 mm negative, so the outer edge moves out by roughly 50 mm. That is 50 mm less fender clearance to find before the tire rubs.
On the inner side, the same 20x10 at -18 moves the inner edge inboard by roughly 12 mm compared to the 20x9 at +20 (half the width increase minus the offset change). That is the number to check against your strut and control arm.
| Change | Outer Edge | Inner Edge |
|---|---|---|
| 20x9 +20 to 20x9 +35 | 15 mm inboard | 15 mm outboard |
| 20x9 +20 to 20x10 -18 | ~50 mm outboard | ~12 mm inboard |
What Each Check Protects Against
- Brake caliper clearance: spoke-to-caliper contact, which can crack a wheel or damage a caliper.
- Inner suspension clearance: rubbing on the strut or control arm, which wears the tire sidewall and can damage suspension components.
- Fender clearance at compression: tire-to-fender contact under load, which can pull a fender or destroy a tire.
- Fender clearance at lock: tire shoulder to liner contact, which is common on lowered or wide-tire setups.
If you cannot test-fit, use the offset calculator numbers to estimate the inner and outer edge movement, then add a safety margin of at least 5 mm on each side before you order. That margin covers manufacturing tolerance, tire bulge, and suspension bushing deflection that static measurements miss.
Safe Limits and What Changing Factory Offset Costs You
Staying within about 5 mm of the factory offset is the conservative rule most fitment specialists follow, and it exists for good reason. Moving further changes scrub radius, which affects steering feel and tire wear, and it shifts load on the wheel bearings and hub. Industry practitioners generally report that exceeding this limit can lead to accelerated tire wear and altered steering dynamics.
The costs of going too far are not always immediate. They show up as:
- Accelerated tire wear from a changed contact patch and scrub radius
- Steering wander or heavier effort as the scrub radius moves away from factory
- Bearing and hub stress from a track width the hub was not designed for
- Rubbing under load that only appears with passengers or cargo
None of this means you cannot change offset. It means you should know what you are trading. A modest move within a few millimeters of factory preserves the engineering the vehicle was built around. A large move is a deliberate trade of handling neutrality for stance, and it should be treated that way.
Start With Your Vehicle Before You Order
The right way to buy wheels is to start with the vehicle, not the wheel. Pull your factory specifications first: bolt pattern, factory offset, factory width, and center bore. Then compare any candidate wheel against those numbers before you look at the photos.
A listing like the VYBZ 18x8 5X112 ET+40 72.6 bore Black Wheel gives you a full spec sheet to practice against. Match the bolt pattern, check the offset against your factory number, confirm the center bore, and only then decide whether the look is right. If the numbers do not line up, the wheel is not for your vehicle no matter how good it looks.
At Project Wheel Works, we check fitment against your vehicle's actual specifications before an order ships, and our Winnipeg installation team can confirm brake and suspension clearance on the car. That is the difference between a wheel that fits and a wheel that fights you every time you drive.
Frequently Asked Questions
What does ET mean on a wheel?
ET stands for Einpresstiefe, German for insertion depth, and it is the same measurement as wheel offset. A stamp reading ET40 means the hub mounting surface sits 40 mm outboard of the wheel centerline, which is a positive offset. You will see ET on most European and many aftermarket wheels, while others print a plain plus or minus number. Either way the figure is in millimeters and describes the same distance, so an ET35 and a +35 are identical.
How do you read the offset stamped on a wheel?
Look on the hub pad, the flat face where the wheel bolts to the car, or on the back of a spoke. You will usually find a size line such as 18x8, a bolt pattern like 5X112, and an offset shown as ET40 or +40. A minus sign or the letters ET followed by a negative number means negative offset. If the stamp is worn or painted over, measure backspacing with a straight edge and convert it rather than assuming the number.
Can the wrong wheel offset damage a vehicle?
It can. Pushing offset far from the factory figure loads the wheel bearings and hub carriers off their designed axis, and it changes steering geometry in ways that show up as tramlining and uneven tire wear. Tight inner clearance can let a rim or tire contact suspension and brake components. Industry guidance puts a workable change at roughly 5 mm either side of the original offset, and anything beyond that deserves a proper clearance check before you commit.
How do I know what wheel offset fits my vehicle?
Start with the factory specification for your exact trim, which you can find on the door jamb label or by asking a fitment specialist with your VIN. Then compare any candidate wheel against that number, its width, and its center bore. A wheel offset calculator shows how much the inner and outer edges move, but it cannot see your brake calipers or fender liners. Measure those on the car, or have the seller confirm fitment for your application in writing.
How does wheel offset affect tire clearance and handling?
Offset moves the whole wheel inboard or outboard relative to the hub, so it changes both inner clearance to suspension and outer clearance to the fender. Lower offset pushes the wheel face outward, which can produce poke past the fender and, at the extreme, rubbing on the arch under compression. It also widens the track and alters scrub radius, which affects steering feel and how the tire wears. Higher offset pulls the wheel in and risks contact with struts, control arms, or brake hardware.
Is backspacing better than offset for checking fitment?
They describe the same geometry from different reference points, so neither is better on its own. Backspacing measures from the inner lip to the mounting surface in inches, which makes it easy to check against a strut or control arm with a tape. Offset measures from the centerline in millimeters and is what most specification charts list. Use offset to compare wheels to each other and backspacing to check the physical gap on your vehicle, then confirm both against the width.
Getting wheel offset right is the difference between a setup that looks and drives the way you wanted and one that rubs, wanders, or wears tires early. Project Wheel Works offers expert fitment support, fast shipping across Canada, and local installation in Winnipeg so the numbers are confirmed before anything ships. Get started with Project Wheel Works and build a setup that fits right the first time.
